Cheese, Onion and Potato Pasty

cooked pasty

This week is a momentous one in British history. Nope, not because Royal Ascot is taking place behind closed doors. It is a magnificent week, because Thursday will mark the glorious reopening of Greggs pie and pasty shop

One of Britain’s most popular stuffed pastry chains, Greggs is rumoured to have a huge branch located inside top-secret-spy-listening station, GCHQ. But if you can’t wait until Thursday to enjoy a Secret-Service-approved snack –  here is a recipe for an easy and delicious potato, cheese and onion pasty.

Pastry bores will say “Actually, it’s not a pasty, it’s a ‘slice’ “. Whatever. You can call it “Mary” or “Horace” for all I care.

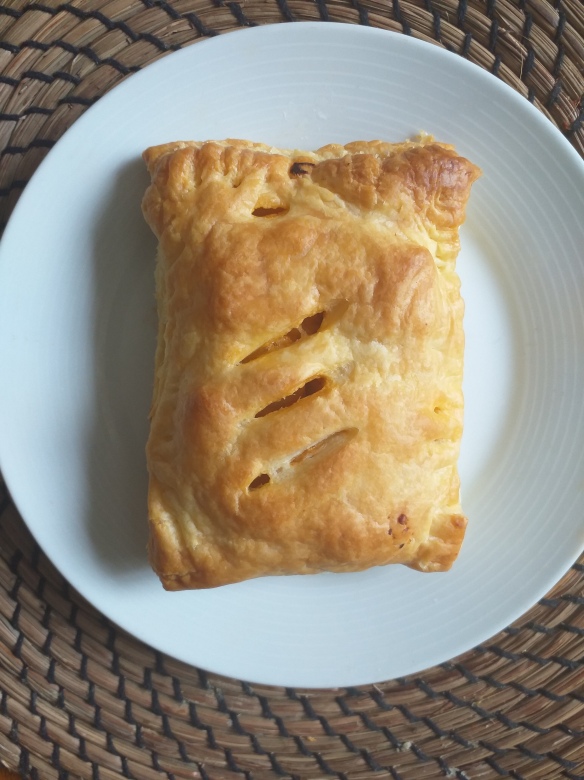
But do make this recipe.  The combination of  delicious, flavoursome filling trapped in a casing of light puff pastry, makes this the perfect snack for a socially distanced picnic.

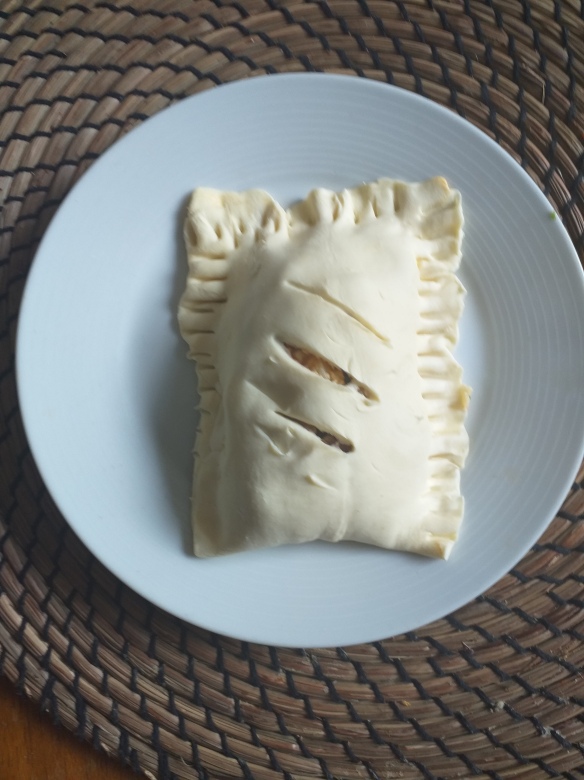
Socially Distanced Slice

1 packet ready rolled puff pastry (the type with built in baking parchment is the best)

1 large potato

1 medium onion

150g tasty/mature cheddar cheese (the stronger, the better)

1 tbsp finely chopped parsley

1 tsp Dijon mustard

1/2 tsp smoked paprika

Sea salt and ground black pepper

Preheat the oven to 175C

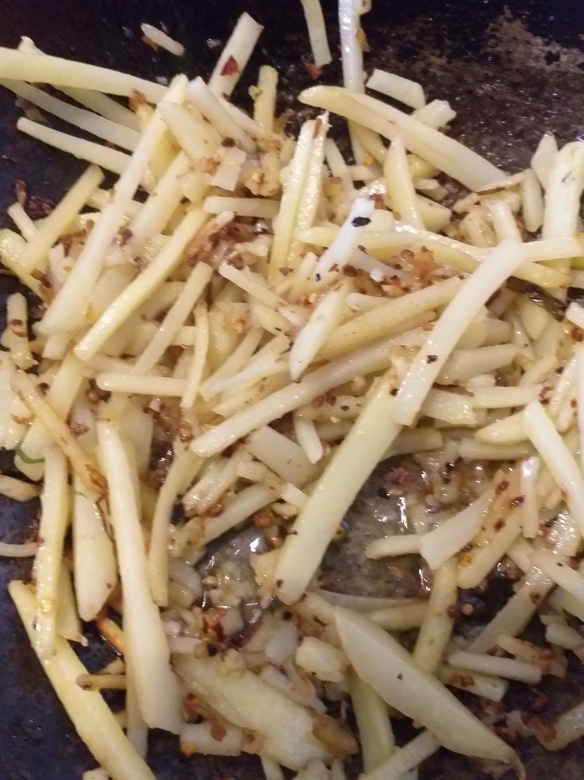
Peel the potato and chop into small cubes. Grate the onion on the coarse setting of the grater.

Put a little oil into a frying pan and fry the potato cubes over a medium heat until they are lightly browned, but not completely cooked through (you want them to retain some bite in the pasty). Drain and place in a large bowl.

Add a little more oil to the pan and lightly fry the onion until just starting to cook (1 or 2 minutes).  No, you can’t cook it at the same time as the potato – don’t even think about it.

Place in the bowl with the potato and leave to cool.

Grate the cheddar and add to the bowl along with the spices and mustard and parsley. Stir through until nicely combined.  You can cover and refrigerate ready to cook later, if you like. The filling needs to be cool/cold when you put it in the pastry. If the filling is warm, the pastry will start to melt and become greasy.

Unroll the puff pastry and cut into 4 strips.

Place a heaped tablespoon of filling on the lower half of each pastry strip. Leave a gap of about 1/2 cm at the edges. Get a pastry brush and paint the edges of the puff pastry with water. Fold the pastry over to make an oblong. Use the tines of  a fork to seal the edges. Now take a sharp knife and make three slashes in the front of the pasty – this is to let the steam escape when cooking.

uncooked pasty

If you have used home made, or chilled puff pastry,  you can freeze the pasties at this point and then cook from frozen as you need them. If you have used frozen puff pastry (but want to freeze them for later) cook first, cool then freeze.

Put the pasties onto a baking tray lined with baking parchment. If your puff pastry came with parchment, then use that – don’t cut a new piece.

Cook at 175C for ten minutes – just to get the filling going. Turn the temperature up to 200C and cook until the pastry has risen and is a lovely golden brown. Try not to eat the pasties the second they come out of the oven, as the filling will be like lava. Great warm, or cold.


Pandemic Pancakes


syrniki and strawberry jam

This pancake is modelling my home made strawberry jam – recipe to follow in another post. Goes very well. Can also eat it like a scone, with some cream and jam on top…

Quick, easy and delicious, these breakfast delicacies are inspired by Slavic syrniki – fluffy pancakes made with cottage cheese.

Cottage cheese is often viewed as a rather bland, low-fat diet food and seems to have dipped in popularity over the last decades.  Time for a rethink: cottage cheese is cheap, it lasts a long time in the fridge (great when queues outside the supermarket are such a bore) and if you mix it with sugar and eggs and flour – it stops being model-fodder and turns into something indulgent and delicious.

These pancakes are a one-mixing-bowl, one frying-pan affair. Serve with jam, honey, maple syrup, or just eat on their own. Best served hot – but good cold too. They freeze very well – so make a big batch and keep some for later.

Pandemiya Pancakes

1 tub cottage cheese (300g) You can use quark or fromage frais for a softer pancake. I prefer the texture of the cottage cheese

2 eggs

125g self raising flour

1 tsp vanilla extract

75g granulated sugar

Pinch sea salt

Vegetable oil for frying

Put the cottage cheese in a large bowl and beat with a wooden spoon until smooth. Whisk in the eggs and sugar until you have a smooth batter. Pour in the vanilla extract and stir through.

Sieve the flour and salt onto the cheese mixture and fold in with a metal spoon. The batter should be sticky and thick.

Heat a little vegetable oil in a frying pan. When hot, carefully drop tablespoons of the mixture into the pan. Aim for a round shape -but as you can see from my picture, it’s not that easy. You could use metal rings to shape your pancakes too.

Cook over a medium heat, lowering the heat if it feels like the pancakes are catching. Cook for a couple of minutes on each side until golden to dark brown.

Serve with jam, honey or syrup – or English-style with sugar and lemon juice..


E

syrniki

This one is served English-style with a squeeze of fresh lemon juice and some granulated sugar for crunch…


The Best Ratatouille

Rat

I love a short cut in the kitchen, as long as it gives great results – but some recipes need to be followed to the letter. Ratatouille, a delicious stew of aubergine, courgette, pepper and tomato, is a dish that looks relatively simple – but takes a bit of work. It is worth it though.

Over the years I have dabbled with different ratatouille recipes to save time. I have added the veg, in stages, to a large casserole pan and stewed them into a pulpy mush. Taking inspiration from that most suburban of side dishes: “Roasted Mediterranean Vegetables” (a lazy tray-bake of nightshades and squashes) I have roasted courgettes, aubergines and peppers in the oven, before combining them with tomato and onion sauce. The roasted veg were spiky and wizened; their tough skins and pulpy centres conflicting in texture. The sauce slid off their leathery hides into a disdainful puddle. It was a disaster.

Ratatouille should be silky and delightful in the mouth. Each component should retain its own characteristics, whilst collaborating with the other ingredients to make a meaningful union.  I have found that the best way to achieve this, is to cook ratatouille the more fiddly, French way.

I inherited my mother’s 1976 copy of “Mastering the Art of French Cooking”  – a two volume paperback set, written by Simone Beck, Louisette Berthold and Julia Child. It is probably the best cooking guide that I own.

French cookery bookMy mother used their recipe to make ratatouille from our home-grown summer vegetables. I remember it taking a while to make something that seemed like a side-show at a barbecue. But it was delicious.

The main rules are: cook the star ingredients separately; once assembled – don’t stir – just let the dish simmer through.

If you have amazing artistic skills – you could arrange the courgette and aubergine slices far more prettily than I have. This is an adaptation of the recipe – but it follows the main rules.

Now that we will be allowed to gather in gardens for barbecues and picnics, this dish would make a great accompaniment for grilled meats – and would also be delicious with a hunk of someone’s lockdown sourdough for a vegan lunch. Ratatouille can be cooked in advance and keeps well in the fridge for a couple of days.

If you are used to wolfing huge bowls of watery stewed veg – be aware: this recipe is pretty rich and satisfying.

Old School Ratatouille

Plenty of good olive oil

Table salt

Sea salt

2 courgettes, cut into rounds 2/3 cm thick

1 large aubergine, halved lengthways and cut into half moons -about 1/2 cm thickness. If the aubergine seems a bit tough -then peel first. I usually leave the peel on, or peel in stripes for a variation of texture

1 large white onion – the milder the better – cut into slim, quarter moon slices

1 red pepper, de-seeded, halved, roasted in the oven and skin removed, then cut into thumb-sized slices

2 cloves crushed garlic

1 tin chopped tomatoes

Freshly ground black pepper

3 tbsp chopped flat-leafed parsley, or a mix of parsley and coriander (my favourite)

Equipment – a large frying pan with a lid. A casserole dish that goes on the stove ( 3 inches deep, ideally, but you can use a bigger one). If you don’t have a casserole – you can reuse the frying pan with a lid.

Start by placing the sliced courgettes and aubergines into a large bowl. Sprinkle with table salt, leave for 30 minutes. Drain, rinse and pat each slice dry with kitchen paper. This is laborious,  but does make a difference.

Take a frying pan, heat some olive oil and fry the aubergine slices in batches until lightly browned on each side. Place in a dish lined with kitchen paper and cover with another layer of paper to absorb excess oil.

Add some more oil to the pan and do the same with the courgettes. Remove to another dish lined and topped with kitchen paper.

Add a little more oil to the pan, if necessary, then stew the onions and peppers over a low heat for about 10 minutes.  Add the garlic and season with some sea salt and pepper.

Carefully pour the contents of the tomato tin over the onions. Cover the pan and cook for 5 minutes on a low heat. Remove the lid, spoon any juice from the sides over the top of the tomatoes, increase the heat and cook until the juice has evaporated.

Take the casserole and spread 1/3 of the tomato and onion mixture over the base. If you are reusing your frying pan – tip out all the tomatoes first and then reassemble.

Sprinkle the tomato mix with 1/3 of the chopped parsley.  Top with half of the courgettes and aubergines arranged prettily (or just haphazardly like my photo). Put another 1/3 of the tomatoes and parsley on top, then the rest of the courgettes and aubergines, then finish with the last of the tomatoes and parsley.

Put the lid on and cook on a low heat for 10 minutes. DO NOT STIR Take the lid off and using a tablespoon, carefully collect the juices from the pan and pour over the top. Tilt the pan to help get hold of them.

Take the lid off and cook for another 15 minutes. DO NOT STIR. Collect the juices from time to time and pour over the top. Be vigilant and make sure that the bottom doesn’t catch. When there is just a little, tomato-coloured oil in the pan, the dish is ready. Season with sea salt and pepper.

This tastes best served at room temperature. If you want to reheat it – then do it really slowly over a low flame.

Potato Farls – A Zero Waste Pandemic Treat

Potato farl

It is still difficult to find baking staples in the shops, but potatoes appear to be plentiful. So if you are keen to make some bread-like goods, here is a recipe that may just suit.

Potato farls are traditional Irish treats that fall somewhere on the baking spectrum between a pancake and a scone. This is an economical recipe: the main ingredient is mashed potato, mixed with a small amount of flour. In Scotland, similar potato-based delights are known as “Tattie Scones”.

I find this a quick, easy and delicious way to use up leftover mashed potato – ideal for minimising food waste and saving money.

Potato farls are delicious served hot, straight from the pan. You can treat them like toast, and top with butter or your favourite spreads (I adore them slathered in Marmite) Or serve them as part of a traditional Irish breakfast 

Potato Farls

500g leftover mashed potato  (or 500g peeled potatoes, boiled and mashed with 1 tbsp butter/olive oil if you are vegan and allowed to cool)

75g white flour (preferably plain/all-purpose flour, but strong white bread flour works just as well)

Sea salt

Place the mashed potato into a large mixing bowl. Sieve the flour and salt into the bowl and use your hands to mix, kneading the ingredients into a dough.

Sprinkle some flour onto large board and turn out the dough. Using a floured rolling pin, roll it out until it is about 1cm thick. If you don’t have a rolling pin, then use a wine bottle – I think many of us may have one or two kicking about during lockdown.

Take a large cereal bowl, turn it upside down and cut circles from the dough. If you have a circular cutter between 6 and 9 inches (15 – 22.5 cm) then please do use that instead. Take a knife and lightly score a cross in the top side of the circle of dough, so the disc appears almost quartered. Gather up any leftover dough – roll it out again and repeat the cutting and scoring process until all your dough is used up. If you do have a small amount left, just fashion it into a small circle using your hands – and eat that one as a cook’s privilege.

Lightly grease a frying pan and turn on the flame. When it is hot, put a farl into the pan and cook over a medium heat – turning it down if it gets too hot. Flip it over after about 2 minutes and cook for a further two minutes. You want the markings on each side to be a tan colour, rather than dark brown – but don’t worry if they catch – they will still be delicious.

Break them into quarters (this will be easy, as you have scored the dough) or just eat them whole. You can give them a quick blast in the microwave if you make them in advance – but they are at their finest eaten fresh

Tattie Scones

Follow the recipe as above, but add 25g of soft butter to the potato before mixing with the flour.

Delicious Lockdown Dhal

dhal potatoes
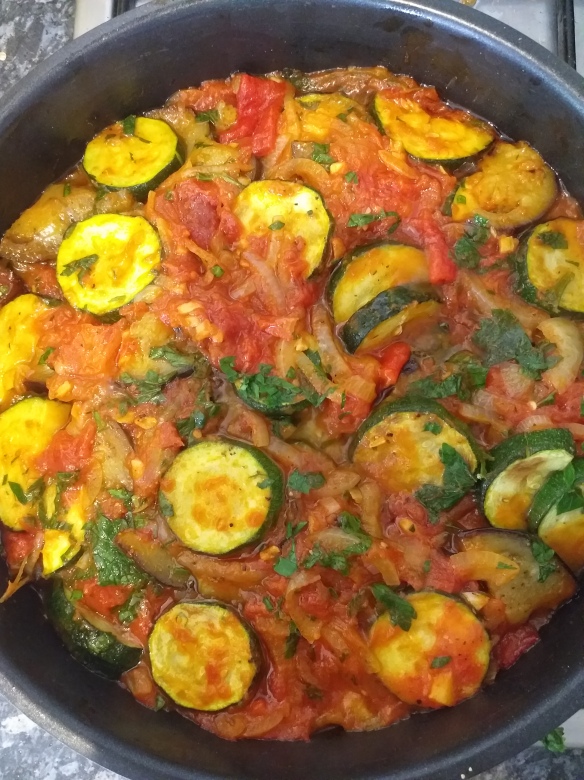
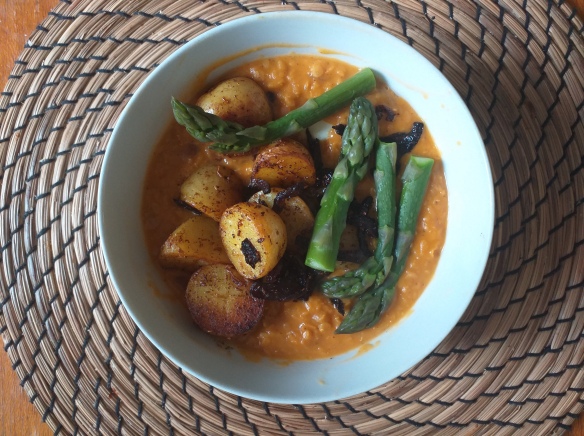
I have been craving spicy food for breakfast and woke desperate for a bowl of rich, warming lentils. I have a lovely, one pot dhal recipe which I make very often, but this time I wanted something with a touch of tomato (probably because it was morning and tomatoes are a recognised ‘breakfast food’) . I also fancied some potatoes – and had a bag of baby new potatoes, which are in season at the moment.

This dish uses a fairly complicated mix of dried spices – which you toast, grind and then divide in half. This recipe yields two separate dishes that come together on the plate. First,  lentils are fried in the spice mix, then stewed in coconut milk and tomato puree. Boiled potatoes are then sautéed in the other half of the spice mixture along with plenty of red onions. It is really important to make sure both potatoes and onions are crispy – the crunchy onions form a delicious textural contrast to the porridge-like dhal.

I know not everyone will have all of these spices  – but try to make as fragrant a mixture as you can manage. If you don’t have fresh or dried curry leaves, try adding some fresh basil, halfway through the cooking process. I prefer to use whole spices and then grind them up, but the ground versions will do perfectly well. At a pinch – just slam in some curry powder and a few chilli flakes.

You can serve the dhal on a bed of rice, or with flatbreads -but I like it best in a bowl, with the potatoes balanced on top. Because it was breakfast time, I buried two, halved, hard-boiled eggs inside the dhal – which added extra richness and a pleasing, bouncy texture. As it is May, and asparagus season – I then finished the dish with a few stalks of boiled asparagus. – bonkers, but delicious

Spuds With Dhal 

1 tsp chilli flakes

10 dried curry leaves

2 tsp mustard seeds

2 tsp turmeric

1 tsp paprika

2 tsp coriander seeds

2 tsp cumin seeds

1 tsp fennel seeds

200g red lentils, washed and picked over to remove any stones

1 tin coconut milk

1 tbsp tomato puree

1 onion, chopped

2 cloves garlic, chopped

2 inch piece of ginger, peeled and chopped

Salt

1 small bag new potatoes (750g) cut into pieces the size of a quarter of an egg, and boiled with skins on

1 onion, sliced into half moons

2 tbsp lemon juice

Coconut oil


Put the whole spices into an empty frying pan and toast over a medium flame. Once they start to scent the kitchen, tip them into a pestle and mortar and grind to a powder. Divide in two.

In a large saucepan, melt 1 heaped tablespoon of coconut oil, then add one of the spice powder portions. Cook for about one minute, then add the onions and cook until they begin to go see through. Add  garlic and ginger, then the lentils and stir until coated.

Pour in the can of coconut milk, then fill the empty can with water and add to the pan. Stir in the tomato puree and leave to cook over a low heat until the lentils have softened (around 40 minutes – I find – which is longer than most recipes suggest).

Meanwhile, melt another two tbsp coconut oil in a frying pan and add the spices. Cook for around 1 minute before adding the onions and frying over a high flame until they start to crisp. Now add the boiled potatoes, stir them to coat, then leave them to cook, turning occasionally so that they get some colour. Once they are looking a bit golden, pour over the lemon juice and add plenty of salt.

You can serve these two dishes separately, as part of an Indian-inspired feast,  or put them together in a bowl (with optional hard boiled eggs and boiled asparagus). Warming, filling and fragrant.

Pandemic Potatoes

Sichuan potato shreds


One of the most visited posts on this blog is my recipe for Chinese sour and spicy stir-fried potatoes – a delicious way to enjoy one of the great staple foods. I thought I would post some variations on this recipe – as the dish does change across regions in China.

Yesterday, I was really craving the numbing, citrus wonder that is the Sichuan peppercorn -so I decided to make a Sichuan version of this dish  (known as qiang tu dou si). It uses dried chilli peppers and Sichuan peppercorns – both store cupboard ingredients and produces a dish with wonderful heat and flavour. Sichuan peppercorns are now available at most large, chain supermarkets – but if you are lucky enough to live near an Asian supermarket, you will also be able to buy them (more cheaply) there too.

If you don’t have dried chillies or Sichuan peppercorns – try shredding spring onions, or leeks and adding them to the dish, to give a nice, fresh, allium layer of flavour.  I have eaten this version in Beijing and Shanghai – not sure which region it hails from, or if it is something that can be found across Greater China.

I have also made a rather inauthentic version of this dish, using shredded carrots and black pepper (which was delicious, but nothing like anything I have ever eaten in China). But play around with ingredients – bell peppers go well with potatoes and add sweetness and freshness. I think the key is to go with a vegetable with strong texture (I wouldn’t add mushrooms or courgettes, for example, as they let out too much water) and to cut the vegetable into similarly sized pieces to the potato, so that everything cooks properly and is easy to eat with chopsticks.

This is a great lockdown dish if you are on a budget – and a fun addition to a home-made Chinese feast.

Chinese-inspired stir-fried potato shreds

2 large potatoes, peeled and cut into very thin matchsticks

2 whole dried chillies or 1 tsp dried chilli flakes

1 tablespoon white vinegar (Chinese rice vinegar if you have it)

1 tbsp table salt

1 – 2 tbsp cooking oil

1 tsp whole Sichuan peppercorns

Fill a large bowl with water, add the salt and vinegar and stir until dissolved. Add the julienned potatoes. Do not omit this step – it is really important to draw some starch out of the potatoes and ensure that they cook properly.

Leave the potatoes to soak for between 30 minutes to 1 hour. Drain, rinse under cold water and pat dry.

If using whole, dried chillies, cut them into rings using a pair of scissors. You can keep or discard the seeds, depending on how well you tolerate chilli heat.

Grind the peppercorns using a pestle and mortar.

Heat the oil in the wok. Add the ground peppercorns and sliced/flaked chilli. Stir fry for a few seconds until fragrant.

Add the potato slivers and keep them moving around the wok. They will start to become transparent.  Cook for at least 5 minutes over a high heat. Add the tiniest bit of hot water if they look like they are sticking. Taste a sliver after 5 minutes – they should be firm, not soft. Give them a little longer over a lower heat if you feel they are not “done”.

Taste, season with salt and serve at once.

Carrot version

2 potatoes, prepared as above

1 large carrot, peeled and cut into similar-sized sticks to the spuds

Freshly ground black pepper

Don’t soak the carrots. Add them to the hot oil along with the potatoes. When both are cooked, season with salt and lots of black pepper.


Allium version

2 potatoes prepared as above

1 leek or 4 spring onions

Shred the leek vertically and cut into thirds – you are aiming for the slices to be a similar length to the potato pieces. Or, shred the spring onions and cut in half.

Add the white parts of the leek/spring onion to the hot oil and cook for about 2 minutes. Add the potatoes and after 4 minutes add the green parts of the vegetable. Once the potatoes are cooked, season and serve.

Cooling Carrot Salad

carrot salad

It’s going to be hot today -and I suspect the supermarkets will sell out of salad leaves and tomatoes fairly quickly. So here is a recipe for a delicious salad made from non-greenhouse vegetables.

I had four rather flabby carrots in the bottom of the vegetable box -with skin that looked chapped and dry, like hands that have been washed too frequently. After a quick peel and a chop, a freshen up with some orange juice, a spritz of perfume from some fresh coriander and a nice bit of crunch from crushed peanuts -these carrots looked beautiful and could grace the most glamorous picnic or barbecue table.

I use a mandolin to cut the carrot into matchsticks. I wouldn’t grate it -it gets too watery. If you don’t have a mandolin then cut the carrots by hand. It’s a bit dull, but worth it for the lovely crunchy texture.

Scorchio! Cooling Carrot Salad

4 large carrots, peeled and julienned

1 handful roasted and salted peanuts

juice of one orange /small glass of long-life orange juice

1 tbsp chopped fresh coriander/substitute for parsley for the ‘haters’

a little salt

Place the carrots in a bowl, sprinkle with  little salt and pour over the orange juice, stirring to make sure they are nicely covered.

Put the peanuts into a Ziploc or small plastic bag and wallop with a rolling pin/back of a cleaver until crushed

Add the peanuts to the carrots and stir. Sprinkle with chopped coriander.


Chilli Paneer – An Indulgent Indo-Chinese Classic

tai pai paneer

Indo-Chinese cuisine originated in Kolkata, India. The large Chinese community, who lived there, adapted recipes from home to accommodate local ingredients. The result was an extremely delicious combination of Chinese cooking techniques and seasonings, mixed with Indian produce.

Paneer is a home made Indian cheese, popular in northern areas of the subcontinent. Cheese doesn’t feature heavily in traditional Chinese cuisine, although a goat cheese called “Rubing” is enjoyed in Yunnan Province, Southwest China. Rubing is fairly similar to paneer in texture, but the goat milk gives it a stronger, more pungent flavour.

The Kolkata Chinese embraced paneer, along with other ingredients less commonly used in Chinese cuisine, like okra and cauliflower. They invented this dish, known as Tai Pai Paneer (or Chilli Paneer) which has become an Indo-Chinese classic. First the paneer is fried, to give it a crispy texture, then it is coated in a spicy, salty and sweet sauce which involves two surprising ingredients: soy sauce and tomato ketchup.

A real crowd-pleaser, this one, but not a health food. For a lighter/vegan version try substituting firm tofu.

Tai Pai Paneer

1 pack paneer (200g)

2 tbsp cornflour

1/2 tsp chilli powder

salt and black pepper

For the sauce

1 red bell pepper, sliced

1/2 green or red chilli pepper, finely chopped

1 small onion chopped

3 spring onions, white and green parts chopped and separated

3 cloves garlic, finely chopped

1 tsp hot sauce (can add more if you are brave)

1 tbsp soy sauce

2 tbsp tomato ketchup

1 tsp white wine vinegar

1 tsp sugar

Cut the paneer into strips about 0.5cm thick. In a large bowl, mix the cornflour, chilli powder, salt and pepper with some water to make a runny batter. You can use less water and make it thicker if you want more crunch. I like a suggestion of batter more than a thick coating -but it is entirely up to you.

Dip the paneer into the batter and shallow fry in a large frying pan or wok, turning regularly until the outside of the paneer is crispy.

paneer fingers

Leave to drain on some kitchen paper while you make the sauce.

Remove all the oil from the pan except 1 tbsp. Fry the garlic for 30 seconds, then add the onion and the white parts of the spring onions. Fry for a minute. Add the fresh chilli and the bell pepper and fry for another 3 minutes, stirring regularly.

In a bowl mix the ketchup, soy sauce, chilli sauce, vinegar and sugar together. Pour this onto the vegetables and mix well. Taste and add more chilli sauce, soy or vinegar to taste.

Carefully put the paneer into the pan and stir until coated with the sauce. Sprinkle with the spring onion greens, heat through and serve. Best eaten straight away, while the batter is crispy.

Isolation Therapy: Smack A Cucumber

smacked cucumber salad

Another classic from my Beijing years, “Smacked Cucumber” (a delicious and flavourful cucumber salad), can now be found in Chinese restaurants all over the UK. Thank heavens, because it is one of my favourite cold dishes. The ongoing lockdown should not be an obstacle to enjoying this – it is simple to make at home.

In Chinese cuisine, cold dishes are an important part of a meal. Served first, they help stimulate the appetite. Smacked cucumbers are easy to make and there are several variations – so you can adapt the recipe to suit your own palate.

The unfortunate-sounding name of this dish comes from the method used to divide the cucumber into pieces. Instead of slicing it up, the cucumber is first bashed with a large cleaver until it bursts, then chopped into bite sized chunks.

The “smacking” gives the cucumber pieces ragged edges, which create a larger surface area to carry the savoury sauce. The bruising effect on the cucumber flesh also makes it more permeable – so the flavour goes deeper into each piece. Oh, and whacking cucumbers is really fun and quite good for channelling frustration. Use a rolling pin if you don’t have a cleaver.

One classic dressing for smacked cucumbers is soy sauce, rice vinegar, sesame oil and perhaps a hit of chilli oil for colour and heat. Sometimes a little chopped garlic is added, sometimes a pinch of ground Sichuan pepper.

I remember eating a version of this dish in Beijing, which clattered my palate with flavour. The sauce was creamy with sesame paste and the individual pieces of cucumber were scattered with so much chopped garlic, it looked like dandruff on multiple, tiny, green scalps. There wasn’t any vinegar in this recipe – the bitter cucumber and garlic provided enough of a bite to cut through the richer sauce. There was, however, plenty of chilli oil and a good, salty lick of soy sauce. It was just wonderful.

So, in honour of this more unusual version, I bring you the recipe. Swap the sesame paste for oil and add 1 tbsp rice vinegar if you fancy a lighter salad. Add 1/2 tsp ground Sichuan peppercorns if you want to give your palate a full work out.

“Smack My Q Up” Salad

1 cucumber

4 cloves garlic, finely chopped

1 tbsp sesame paste (tahini) – exchange for 1 tbsp sesame oil, if you want a lighter version

1 tbsp chilli oil (I use the oil from my trusty Laoganma)

2 tbsp light soy sauce

1 tsp sesame oil (leave out if swapping the paste for sesame oil)

1 tsp caster sugar

1 1/2 tsp rice vinegar (optional)

Table salt.

Using a peeler, remove strips of peel from the cucumber lengthways, leaving stripes of green.

cucumber

Take a large cleaver and with the blade facing away from you, use the flat side to bash the cucumber up and down its length until it bursts. You can also whack it with a rolling pin to achieve the same effect. Cut the ends off the cucumber and discard.

Chop the rest of the cucumber into pieces about an inch in size. If you can make them diamond shaped – all the better. I’ve seen recipes where the seeds are removed -but I don’t think that is necessary – I like the flavour the seeds bring.

Place the cucumbers into a sieve and set over an empty bowl. Sprinkle them with table salt – to help “cook” them and leave for 15 minutes, to draw out some liquid.

chopped cucumber

In a large bowl mix all the dressing ingredients together. This might take a bit of stirring, as the sesame paste can be quite stiff.

Once the cucumbers have had their 15 minutes -rinse off the salt and pat them dry. Put them carefully into the sauce and stir until they are coated. Put onto a serving dish and sprinkle with the chopped garlic.


Two Ways With Leftover Veg: Bubble And Squeak Reimagined

There are two basic principles to observe when avoiding food waste: Use all the fresh ingredients that you buy and find ways to use up leftover, cooked food.

I had about half a head of cooked broccoli florets and six baby new potatoes left over from Easter lunch. The traditional British method of despatching cooked vegetables after a “Sunday Roast” is to chop them up, mix them together and shallow fry as a patty. Common leftovers would be boiled cabbage (as no one really likes it) and roast potatoes. The dish became known as “Bubble and squeak” because of the strange cries that cabbage lets out as it is subdued into a crispy disc in the pan. This dish was usually served on a Monday, with slices of leftover, cold, roast meat.

Bubble and squeak has been popular in the UK since the 19th century -but I don’t like it. It feels cheap and mean and listless.

I never serve boiled cabbage, but always cook broccoli to accompany roast meat- as it is one of the few vegetables everyone in the family will eat. And yet, I’m not hugely keen on broccoli as a leftover – there is something rather damp and whiffy about it. I feel like I need to hide it away and drown out its weird pong with some strident flavours.

Taking bubble and squeak as a starting point, I roughly chopped the cooked broccoli and potato and mixed them together. I decided it would be fun to make pastry parcels, and some kind of fritter.

Initially, I had thought of seasoning the vegetable mixture with Indian or North African flavours – but decided against it. So many of my recipes are heavily spiced, I felt it would be a pleasant change to go for something  to suit a more delicate palate; something more British.

The image of a potato, cheese and onion pasty became fixed in my mind, so I chose classic British flavours – English mustard and strong Cheddar cheese, to pair with the broccoli and potato. Instead of wrapping the mixture in thick pastry and baking it in the oven, I chose thin filo pastry, which I then deep fried to give a splintering exterior – a nice textural counterpoint to the soft, rich and comforting filling. Making the triangles is a little bit fiddly, but well worth the trouble. They are delicious served with the labneh from the previous post, a dollop of sweet chilli sauce or a tomato chutney

For those who might not enjoy pastry, or who want a quick and simple fix for leftover vegetables, I have included a recipe inspired by pakora. The basic vegetable mixture is combined with gram flour, formed into balls and deep fried. To make these vegan, simply replace the cheese with a non-dairy equivalent, or just leave out completely.

Reimagined Bubble And Squeak

1 packet Filo pastry sheets

8 florets cooked broccoli

6 cooked baby new potatoes

1 large onion, chopped

100g grated Cheddar (as strong as you can find)

1 tsp dried mustard powder

sea salt and pepper

2 tbsp chick pea flour (gram flour)

a little water.

Dice the broccoli and potatoes and mix together. Fry the onion in a little oil until translucent. Add to the broccoli and potato mix. Sprinkle over the grated cheese and dried mustard – stir well. Season liberally with salt and pepper.


Pastry Triangles

Take a sheet of filo pastry and fold it in half to make a long, thin oblong. Place a teaspoonful of filling off centre, approx. 1.5 cm from end of pastry nearest your dominant hand (I am right-handed so I work from right to left. It will be the opposite for left-handed people). Fold over the corner of pastry to cover filling. Fold the wrapped fillingover to give a triangular shape and continue folding the triangle, until all the length of the pastry is used up. Tuck in the edges to make a neat parcel and to ensure none of the filling escapes during cooking..

Deep fry at 170-180C until the pastry is golden brown. Drain on plenty of kitchen paper.

Crispy Balls

Stir the gram flour into the vegetable mixture. Add a splash of water and stir through. You want the mixture to be very sticky, but not runny. Using two dessert spoons, form the mixture into  balls and place into the deep fryer. Cook at 170C until crispy and brown.  Drain on kitchen paper.