Quick, Easy, Hot and Sour Soup

This vegan recipe is a store cupboard special – made almost entirely from things I have knocking about in my cupboard. It is so quick and easy to make and its spicy freshness makes it a perfect lunch dish.

A Sichuan classic, hot and sour soup can now be found on Chinese restaurant menus across the UK. The combination of heat from chilli oil and acidity from Chinkiang vinegar is compelling and addictive, while the calming, light flavour and silky texture of the tofu provides balance. I find many soups boring and regularly lose interest before I reach the bottom of the bowl. I often have second helpings of this one.

Hot and Sour Soup

1 pack of silken tofu. This tofu does not have to be kept in the fridge and has a long shelf life. It is always a good idea to have a packet or two in the cupboard.

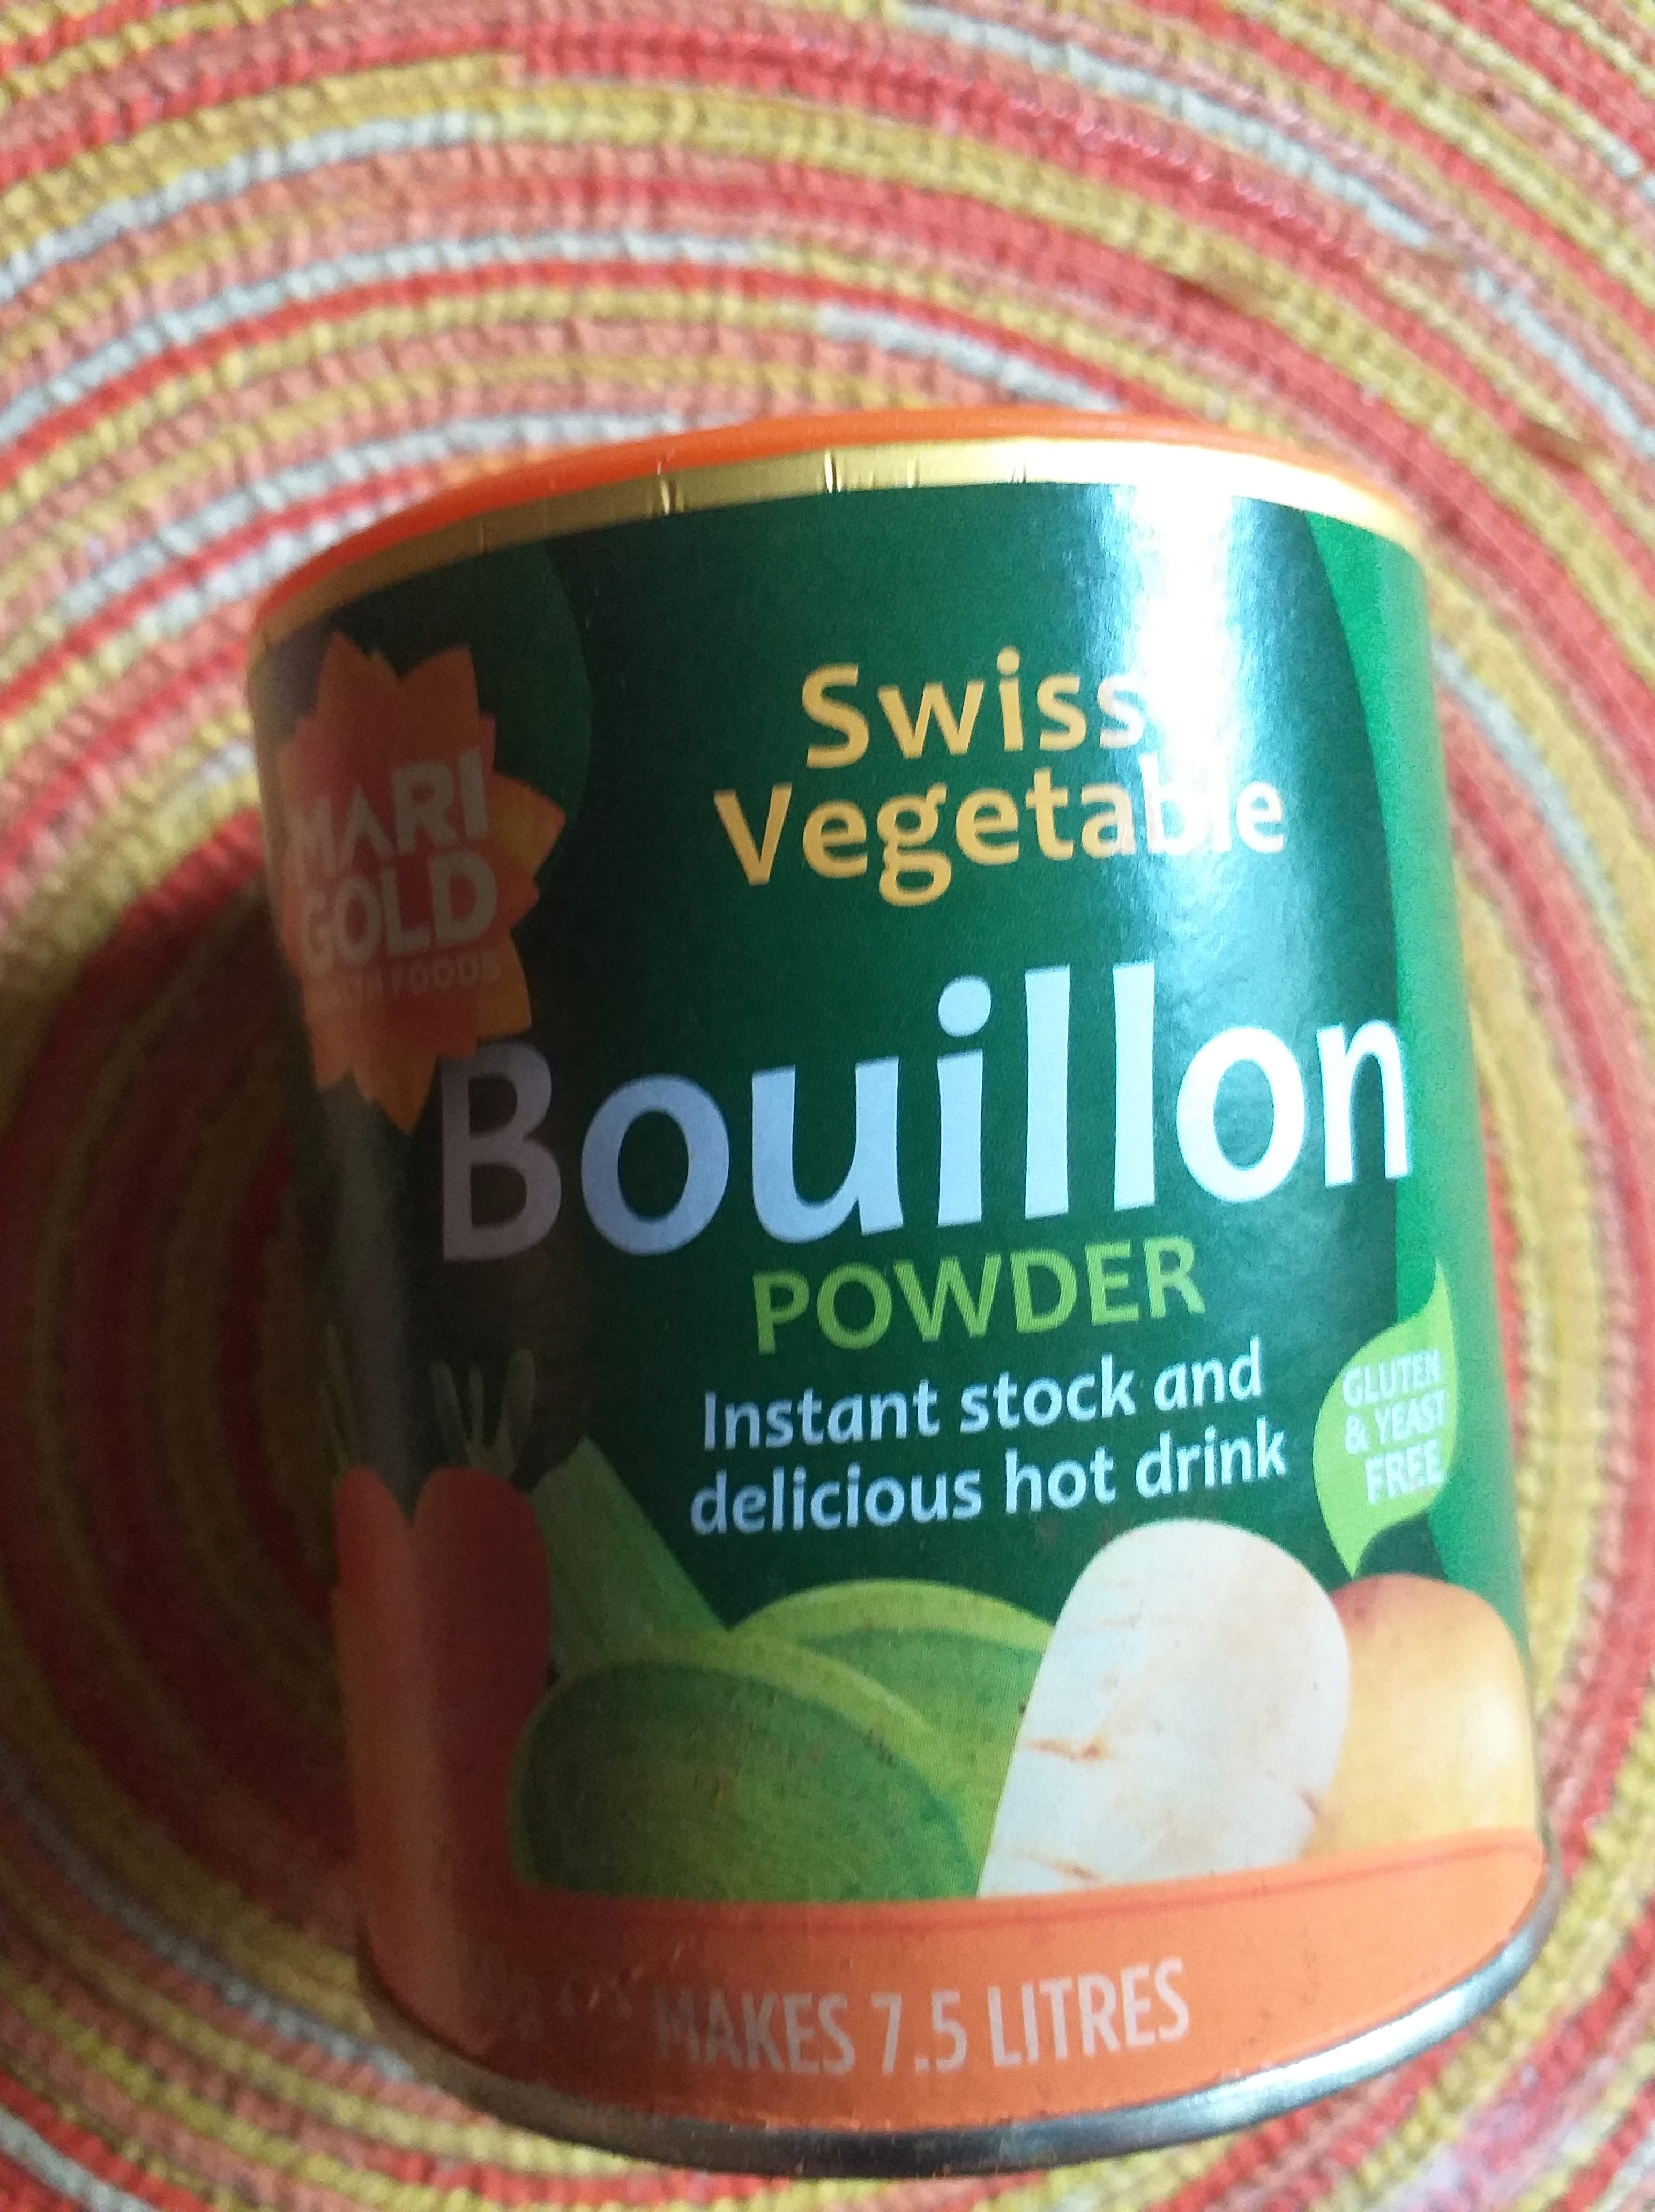
1 tbsp high quality vegetable stock mixed with 600ml boiling water. I use this one… If you have fresh vegetable stock (or chicken if you are not vegetarian) feel free to use 600ml fresh stock instead.

Green part of a spring onion, chopped

1 tbsp chopped parsley or coriander (optional)

1 tbsp light soy sauce

1/4 tsp ground pepper (I use black, but I think it is more correct to use white)

2 tsp vegetable oil

Large pinch of salt

2 tbsp cornflour mixed with 4 tbsp cold water

3 tbsp Chinkiang vinegar

1 tsp sesame oil

1 tbsp chilli oil (I use laoganma)

1/4 tsp ground Sichuan peppercorns

These quantities will produce 2 big bowls of soup (or 4 small ones)

Drain the tofu and place in a bowl. Use a fork to crush it slightly so it begins to fray into pieces.

Place the stock, pepper, salt and vegetable oil in a large saucepan and bring to the boil. Add the cornflour mixture to the pan, stirring slowly. This will thicken the texture of the broth and help stop the tofu from sinking to the bottom. Carefully place the tofu into the pan and heat gently until warmed up. Add herbs, if using.

Switch off the heat and season with the vinegar, soy sauce and sesame oil. Divide the soup among your serving bowls, making sure the tofu is evenly distributed. Carefully dot the chilli oil over the surface of the soup and sprinkle with the spring onion greens.

Patatas Bravas – The Ultimate Spanish Spud Dish

Spanish Spuds Slathered In Spicy Sauce

Picking a favourite potato dish would be extremely hard for me. The potato is one of the most versatile, cheap and delicious vegetables on the planet, celebrated globally, with the ability to transform into a million different dishes. From bland and comforting to refreshing, indulgent and exciting, for every season, every mood, every major life event, or minor diversion there will be a potato recipe that will supply exactly what is required at that moment. You don’t even need to whip out a peeler, or go near a kitchen to appreciate this magnificent tuber – a packet of crisps is only a corner shop away, ready to deliver salty, crunchy, potato satisfaction in an instant.

I have long appreciated the magnificence of patatas bravas, chunks of crispy potato, bathed in a piquant sauce and soothed with garlic-accented mayonnaise. Until recently, this was a dish I tended to order in a restaurant, rather than make at home.

I started researching recipes and experimenting with different cooking methods – and am still pretty much in the dark about the “authentic” way to make this famous dish. Some claim the sauce should involve tomatoes, pretty much all agree that there should be some vinegar and hot pepper involved, others insist on paprika.

As for the cooking of the potatoes, I came across a range of techniques: roasting in the oven; par-boiling and roasting/shallow frying; shallow frying from raw; deep frying.

I went with my palate and chose to deep fry, as this technique gave the potatoes a perfect crispy outside and a less greasy texture than their shallow-fried counterparts. Oven roasted potatoes came out plain-tasting and too uniform in texture – the sauce permeated their flesh, making it damp, rather than serving as a rich, fragrant cloak. I do understand that people think roasting is a healthier cooking method than deep-frying, but if you deep fry at the correct (i.e not too low) temperature and remove the fried potatoes to kitchen paper to drain, they really don’t retain much oil – and their texture is superior.

I veered away from tomatoes in my spicy sauce – I felt they made it a bit too ketchupy. I do think it is important to have a good, ruby colour to the spicy sauce and I found a combination of two different smoked paprika worked very well. I added a touch of mustard, something I had not come across in my research, but it delivered another layer of punch and acidity.

This dish can easily be made vegan, by swapping the honey for a vegan syrup and using a vegan mayonnaise substitute.

Look carefully at the tins: one is spicy, one is sweet

Spicy Spanish Spuds

¼ cup olive oil

2 tsp sweet smoked paprika, 1 tsp hot smoked paprika

1 tsp cornflour

1 cup vegetable stock

½ tsp sea salt

2 tsp white wine vinegar

½ tsp mustard

2 tsp honey

4 large potatoes.

3 tbsp mayonnaise or vegan susbtitute

3 cloves of garlic, crushed

Peel and cube the potatoes (around 1 ½ inch cubes). Soak in cold water for as long as you can.

While the potatoes are soaking, start the spicy sauce. Place the olive oil in a saucepan and heat. Add the smoked and spicy paprika to the oil and stir well. Pour in the vegetable stock and cook for one minute.

In a small bowl, mix the cornflour with 1 tbsp water to make a slurry. Add this to the paprika and stock and whisk to combine and thicken the mixture. Cook for around 10 minutes, then add the vinegar, mustard, honey and some salt. Taste and check the acidity and salt. Turn off the heat and start to work on the potatoes again.

Mix the mayonnaise with the chopped garlic.

Drain the potatoes from their soaking liquid and pat dry really well.

Deep fry them in batches using an oil frying temperature of 170C

Cook the potatoes until they are golden and yielding. This will depend on the type of potato you use, but I would say around 7 -10 minutes per batch. Drain the cooked potatoes on kitchen paper remove to baking tray and keep warm and dry in a preheated oven 100C

Reheat the sauce – there will be a skin on top, don’t worry – just stir it gently back into the sauce as it warms.

Put the potatoes in a warm serving dish. Pour over the reheated, spicy sauce and top with spoonfuls of garlicky mayonnaise. Scatter a few chopped parsley or coriander leaves on as a garnish.

Top Bun: Yorkshire “Fat Rascals” – A Delicious Tea Time Treat

Like the offspring of a rock cake and a scone, these fruity, rich cakes are easy to make and delicious to eat

Loaded with dry fruit and fragrant with sweet spices, “Fat Rascals” are the ultimate tea time bun. Falling somewhere on the baked goods spectrum between a rock cake and a scone, they manage to be both cakey (they rise in the oven) and biscuity (they have a pleasing exterior that provides a bit of crunch)

Christened by fancy Yorkshire tea room “Bettys”, Fat Rascals are thought to be based on a 15th century recipe for traditional Yorkshire turf buns, . Turf buns were made from a scone-like dough, enriched with lard and fruit, then cooked on a griddle over a turf fire. Bettys tea room jazzed up the recipe (which they keep secret), baked the buns, rather than griddling them, then gave them a catchy new name.

It looks like the name “Fat Rascals” has been trademarked, so I am going to call my version Fat Imposters. I haven’t managed to get my hands on the secret recipe, but I think this is pretty close. Easy, quick and delicious -these are a good pick-me-up for lockdown January.

Fat Imposters

225g self raising flour

125g cold butter, cubed

1 tsp ground cinnamon

1/2 tsp ground mixed spice

75g caster sugar

Zest of one lemon

Zest of one orange/tangerine

2 tsp lemon juice

125g of mixed fruit – I use half sultanas and half raisins

1 egg, beaten

150ml single cream. You can substitute with milk

Blanched almonds and glace cherries to decorate

Preheat the oven to 190C

Sift the flour and spices into a large mixing bowl. Rub in the butter using your fingertips until it resembles coarse breadcrumbs. Stir in the sugar and dried fruit. Mix in the beaten egg. Add the citrus zest and juice to the cream and stir well. Pour the cream onto the mixture and stir with a fork until it comes away from the edges of the bowl and forms a large, sticky ball.

Grease a baking tray. Using a tablespoon, dollop heaps of the mixture onto the tray.

I made 9 largish Imposters with this quantity – each one around 3 inches in diameter. Feel free to make them larger or smaller, just adjust the cooking time a little (longer for bigger, shorter for smaller). Using the spoon, neaten them up as much as possible into round, domed shapes.

Fat Rascals are decorated with 2 glace cherry halves (the posh, undyed ones, not the garish scarlet ones) and then three whole, blanched almonds underneath. They look a bit like eyes above a set of fangs. To avoid any accusations of copying, I only use 2 almond fangs. Again, feel free to improvise.

Carefully place the cherries and almonds on top of the mounds of cake dough and press them in lightly. Bake in the oven until golden brown. Mine cooked very quickly – in around 13 minutes -but it will depend on your oven. Keep a close eye – when they smell delicious and look golden brown, remove them to a cooling tray.

Kimchi Fried Rice Is The Answer To All January Culinary Questions

Whatever your January culinary good intentions may be, Kimchi Fried Rice is probably the dish you should start making – as it ticks a huge number of New Year Resolution boxes:

Cutting down on meat? This is a vegetarian recipe.

Doing Veganuary? Make it vegan by leaving out the fried egg.

Cutting down on food waste and trying to go to the shops less frequently? This recipe uses store cupboard ingredients and left-over rice.

Trying to spend less? This is a cheap and cheerful dish, cooked quickly on the stove, so uses less energy.

Trying to include more superfoods in your diet? Kimchi is fermented, full of natural probiotics and great for the gut. It is packed with nutrients and reputed to strengthen the immune system. A plus during a pandemic.

Both kimchi and gojuchang are now widely available at large national supermarkets. But if you can get to your Asian grocery store – you will probably find these ingredients at a better price AND it is a good way to support independent traders.

Kimchi Bokkeumbap

350g cooked white rice

Vegetable oil

1 tin kimchi (160g)

1 small onion, chopped

1 tbsp gojuchang

1 tbsp sesame oil

1 spring onion, finely chopped

1 tsp soy sauce

2 eggs (optional)

Open the tin of kimchi and strain using a sieve over a bowl. Press the cabbage down with a spoon so you collect all the juice. Chop the fermented cabbage into strips.

Add the soy sauce and gojuchang to the reserved kimchi juices, Stir well until the gojuchang has dissolved.

Place a little oil in a wok and heat. Add the chopped onion and the white parts of the spring onion. Fry for a minute. Now place the chopped kimchi into the pan and stir fry for around three minutes until it begins to brown. This will give it a lovely, slightly caramelised taste.

Place the rice into a large bowl and drizzle with the sesame oil. Mix it through using your (very well washed) hands until every grain is coated. This will stop it clumping together during the frying process and will add a toasty note to the dish.

Add the rice to the wok and stir fry well until all the grains are separate. Pour over the kimchi juice mixture and stir fry until all the liquid has been absorbed/evaporated.

In a separate frying pan, fry the eggs until the whites are cooked but the yolks remain soft. I cheat by half filling my pan with vegetable oil and almost submerging the eggs in it, so there is is no danger of “snottiness” in the white, and the yolks become hot but not set. Thriftier types may prefer to use less oil and flick it over the yolk gently.

Serve the rice topped with the fried eggs. Sprinkle them with a little sea salt, if you are a salt monster like me (leave out the eggs if you want to keep the dish vegan). Sprinkle with the spring onion greens – do add some chopped fresh herbs if you have some around.

Kick Off Veganuary With A Spicy, Tingling Noodle Dish – Vegan Dan Dan Mian

Each year, more people embark on a month of plant-based eating during January called “Veganuary”, I thought it would be helpful to share a recipe that will dispel any fears that vegan food is always bland or worthy. This is a rich and feisty noodle dish – Dan Dan Mian.

This dish has its origins in Sichuan, a province in the west of China, with a damp climate, grey skies and fertile soil. Sichuan cuisine is famed for its wealth of dishes (estimated at 5,000 different recipes), its eponymous “peppercorn” (which numbs and prickles the lips and tongue) and its devotion to the fire and power of chillies -whether fresh, pickled or dried. There is a lot more to Sichuan cuisine than just chilli heat and numbing spice – but this recipe truly celebrates both these fierce and delicious elements.

It’s a very sensual dish – tangles of noodles, slick with a fiery, sesame coating, flecked scarlet with chilli oil are studded with flavourful, minced vegetable “meat”. It is also extremely satisfying – great for people with huge appetites and a craving for flavour.

The best noodles to use are Chinese wheat noodles (without egg). You can substitute with durum wheat spaghetti (which is very cheap). The traditional recipe uses minced pork or beef as a topping. I thought about using soy mince as a substitute, but decided against it. Instead, I make “meat” out of ground mushrooms, celery and peanuts then cook it with garlic, Chinkiang vinegar and some not-v-authentic red wine.

I prefer to serve this dish in a large bowl, mix the sauce, noodles and topping together, then let people help themselves. Not suitable for chilli-cowards or carb-dodgers. Don’t wear a white shirt. Don’t try to be dainty.

Vegan Dan Dan Mian

200g Chinese wheat noodles or durum wheat spaghetti

For the “meat” topping

150g button mushrooms, stalks removed

1/2 head of celery -leaves and all

100g salted peanuts

2 cloves garlic, finely chopped

1 tbsp Chinkiang vinegar

2 tbsp red wine

For the sauce

1 heaped tbsp sesame paste

2 tsp sesame oil

2 tbsp chilli oil.

2 tbsp light soy sauce

2 tbsp dark soy sauce

1 heaped tsp Sichuan peppercorns, ground in a pestle and mortar

200 ml boiling water

Using a food processor, blitz the mushrooms to a fine mince. Place in a large bowl. Do the same for the celery stalks and leaves and add to the mushrooms. Finally grind the peanuts to a rough powder and mix into the celery and mushroom mixture.

Place a small amount of vegetable oil (around 2 tbsp) into a large frying pan and briefly fry the garlic until it begins to release its scent. Add the vegetable and nut mixture and cook over a low heat for around ten minutes. Add the vinegar and wine, stir through until the liquid has evaporated

Bring a large pot of water to the boil. Add the noodles/spaghetti and cook until tender. Drain

Mix all the sauce ingredients in a heatproof jug.

To assemble the noodles: Take a large container (I use a lidded, pottery casserole dish that I warm in the oven for ten minutes -but any large bowl will do)

Pour the sauce into the bowl. Arrange the drained noodles on top, then spread the “meat” over the top of the noodles. I sometimes add a few chopped coriander leaves to add some colour.

Using two large spoons, mix everything together. Serve, making sure everyone gets a good balance of sauce, noodle and “meat”.

Indulgent Indo-Chinese Classic: Kung Pao Potato. Vegan, but Vicious

Here is a cheap recipe that tastes expensive – ideal if you are tightening the belt a little before a Christmas spending spree. This Indo-Chinese classic is inspired by Kung Pao Chicken – a popular Chinese dish that features cubes of chicken, dried chillies and peanuts.

Indo-Chinese cuisine evolved within the Chinese community of Kolkata, India. It combines local, Indian ingredients with Chinese cooking techniques.

Potato dishes are eaten throughout Greater China, – spicy mash can be found in Yunnan province; shredded, stir fried potatoes come in spicy, sour, peppery and oniony flavours and are popular across the North. This recipe is richer and more filling. It uses cubes of shallow fried potato to deliver a crispy texture, prized in Indo-Chinese cooking, The potatoes are teamed with peanuts, then given a quick bath in a sweet and spicy sauce. It is a powerful dish – heat comes from three different and equally vicious sources: dried chillies, fresh green chilli and chilli sauce.

Although it sounds fancy – the ingredients for this recipe are available in national supermarkets and it is cheaper to make than Kung Pao Chicken. The sauce features tomato ketchup, widely used in Indo-Chinese cuisine for its sweet and acidic properties.

I have dialled down the heat from the “correct” recipe as it was very, very spicy and intense. If you can take a lot of heat, swap the cooking oil for chilli oil and double the amount of dried chilli flakes.

Kung Pao Potato is a great dish for cold weather and one I like to serve in between Christmas and New Year – when I crave something with a bit of a kick. Fully vegan, but not a “health food” – don’t tighten those belts too much…

Vicious Vegan Potatoes

1 large baking potato, peeled and cut into 1 inch chunks

Vegetable oil for shallow frying

1/2 white onion, chopped

4 (yes, you heard me correctly) large cloves of garlic, finely chopped

1 inch of ginger, peeled and finely chopped

the green parts of two spring onions, chopped

150g salted peanuts

2 tbsp vegetable oil. Substitute chilli oil for a more “correct” version

1 heaped teaspoon of chilli flakes OR 3 dried chillies, snipped into rings

1/2 fresh green chilli, chopped

2 tbsp light soy sauce

1 tbsp tomato ketchup

a few drops chilli sauce

1 tsp sugar

1 tsp salt (optional – I use it, but I am a salt monster)

1tsp cornflour mixed to a paste with 2 tbsp water

1 cup boiling water or vegetable stock

Bring a pan of water to the boil. Add the potato chunks and cook until they can be pierced with a knife. You want them slightly underdone as they are going to be shallow fried.

Drain the potatoes. Put one inch of cooking oil into a wok and shallow fry the potatoes until golden, tuning once, Remove the potatoes, drain on kitchen paper and discard the oil.

Place two tablespoons of fresh oil (or chilli oil, if using) into the wok and heat gently. Add the dried chillies and cook for two minutes. Now add the white onion and cook for one minute. Add the ginger and garlic, stir well until you can smell their fragrance.

Mix the soy sauce, ketchup and chilli sauce together. Pour it into the wok and combine with the other ingredients. Sprinkle with sugar and salt and let them dissolve. Add the cup of water/stock and cook for one minute, before adding the cornflour paste. Stir and wait for the sauce to thicken and become glossy.

Place the peanuts into the sauce along with the fried potato cubes. once they are heated through and coated with the sauce, remove to a serving dish and scatter with the spring onion greens and green chillies. Eat immediately – the potatoes will become soggy if left.

Spice Up Your Soy Mince – Vegan Keema

I suspect many vegetarians have a packet of dried soy mince like the one in the photo below, lurking at the back of their cupboards. Cheap, long lasting and easily available in supermarkets and health food shops, dried soy mince seems a sensible choice as a substitute for minced beef or lamb. But the reality is, that the rather wet texture it assumes after rehydration can be off-putting. Its bland flavour also needs a lot of help.

Inspired by the perfumed spices and fresh aromas of Indian street food classic Keema Pav, the following recipe will transform dehydrated soy mince into a fragrant dish, packed with protein,

Traditional Keema Pav is a slow-cooked blend of minced meat (usually mutton or goat) and spices, fresh with tomatoes, ginger, garlic and onions, served in a soft, buttery roll. Believed to have its roots in Iran, it has since become a popular Mumbai street food – and there are variations, one involving the addition of an egg, which cooks in the hot meat mixture.

I was introduced to Soy Keema at the wonderful Indian Accent restaurant in Mayfair, London – which has sadly closed, due to Covid-19. A small bowl of rich and fragrant soy mince, with a delicate quail’s egg cracked into the centre, was served with a bouncy, buttery lime-leaf pao (bun). Meat eaters at the table had no idea they were eating soy, the texture was perfect and the flavours layered and complex.

I have been fiddling about, trying to get this recipe right for about two years – and now I think I have cracked it. I had been skimping on oil, which was a mistake – the dish needs fat to carry the flavour.I also realised that it is very important to cook the tomatoes for a long time before adding the cooked mince.

Feel free to put the mixture in a bun, but I tend to eat a large pile of it in a bowl, with some flatbread to mop up the spicy gravy.

Soy keema: a sprinkle of fresh coriander added just before serving ensures a delicious scent will rise from the bowl

Vegan Soy Keema

80g dried soy mince

50 ml coconut oil (Vegetarians may use ghee to add a richer, buttery flavour)

1 onion, finely chopped

250 g fresh tomatoes, chopped – or half can chopped tomatoes.

Half a fresh green chilli, deseeded and chopped – feel free to add more, if you are hardcore

2 cloves garlic, chopped

1 inch piece of ginger, peeled and finely chopped

1 handful fresh coriander, chopped (substitute for fresh parsley, if you are a “hater”)

1/2 tsp cumin powder

1/2 tsp turmeric

1/2 tsp hot chilli powder

1tsp garam masala

Put the soya granules into a pan of boiling water and cook until soft (I find this takes a matter of minutes). Drain well and set aside.

Melt the coconut oil in a large sauce pan and fry the onion until golden brown. Turn down the heat and add the turmeric and chilli powder until you can smell them. Now add the tomatoes, garlic, ginger and chilli and cook for a minute. Add the remaining dried spices and cook well until the tomatoes are softened and the mixture is well combined.

Place the cooked soy mince into the tomato mixture and cook over a low heat for around three minutes. The soy should begin to separate into grains. Season well with salt and just before serving, sprinkle with a handful of fresh coriander. Serves 4 – the helpings are small as the dish is very rich.

Life-changing, Sticky, Smoky, Spicy Tofu

Tofu is a delicious, magical, healthy and versatile ingredient – but I still hear complaints from people who can’t seem to get along with it. The most frequent feedback I hear is that the texture seems “damp and unpleasant”, or that the flavour is “bland and sour”.

Although the phrase: “There is no such thing as bad weather, just bad clothing” makes me want to punch a wall, there is some truth in it. The same peppy, judgy approach can be applied to tofu: There is no such thing as bad tofu, just bad cooking. Texture too damp for you? Press the water out and deep fry it. Bland flavour? Add some smoky, salty, chilli notes to your dish. Sour? Douse it in honey.

When I visited Singapore a couple of years ago, my friend Joyce took me to a fantastic hawker market, where she introduced me to a delicious, deep-fried tofu dish – Tauhu Goreng. The tofu was crispy on the outside and yielding in the centre. It was slathered in a creamy, spicy, sauce, but the richness of the dish was neatly offset by some shredded carrot and cucumber – delivering both crunch and freshness. It was magnificent and I have since recreated it in my own kitchen.

On another occasion I tried a wonderful Korean dish, Tteokkochi. where boiled and fried rice cakes are lacquered with a sauce that is thick with honey and rich with gojuchang (a fermented rice paste spiked with chilli powder).

Inspired by the flavours and textures of these two amazing dishes, I decided to make a strange hybrid, to pair the freshness and crispiness of Tauhu Goreng, with the sweet, smoky and spicy flavours of Tteokkochi. I am going to make a bold boast – that this dish could convert tofu-doubters to tofu-lovers.

Gojuchang is available in several UK chain supermarkets, but tends to come in tiny, stingy, expensive pots. I buy it in larger quantities from the Korean or Chinese supermarket. If you want to make this dish gluten free, use a gluten free gojuchang and replace the soy sauce with tamari. If you want to make the dish vegan, replace the honey with a non-bee-related syrup.

With a little julienned cucumber on top, for freshness and crunch

I pack firm tofu, drained, patted dry with kitchen paper and cut into slices 1 cm thick

1 large carrot, grated

1/3 cucumber, julienned

1 finely chopped white onion

Small bunch of chives, snipped

1 thumb of ginger, peeled and finely chopped

2 large cloves of garlic, finely chopped

2 tbsp sesame seeds

2 tbsp honey

2 tsp gojuchang

2 tbsp light soy sauce or tamari

1 tbsp sesame oil

50ml water

A little rice vinegar

Place the sesame seeds into a dry frying pan and cook over a low heat until lightly toasted. Place into a bowl and set aside. Cover the bottom of the frying pan with vegetable oil and heat. When the oil is very hot (check by putting a small piece of tofu in, it should hiss and spit a little), place the tofu in the pan and fry, turning once until golden brown on both sides. Remove the tofu to a plate lined with some kitchen paper. Put some more kitchen paper on top of the tofu to remove any excess oil.

Decant the cooking oil from the frying pan into a small saucepan and then return one tablespoon to the frying pan. In a bowl mix the honey, soy sauce, gojuchang, sesame oil, garlic, ginger, onion and carrot together with the water. Stir well until combined.

Reheat the oil in the frying pan and add the contents of the bowl. Cook over a low heat for a few minutes -the kitchen should start to smell really delicious. Add the fried tofu pieces and stew in the sauce for a couple of minutes before turning over. Turn off the heat and scatter with the chives and sesame seeds.

To serve, place the tofu slices on a plate and cover with the sauce. Arrange a pile of cucumber on top of the dish and dot with a few drops of rice vinegar. Serve with plain, boiled rice

Biscoff Biscuits Made Of Biscoff Biscuits

20200820_124419

I love Lotus Biscoff, those caramelized biscuits that are often dished out in fancy cafes. A Belgian staple since 1932, the name is a combination of “biscuit” and “coffee” – genius!

I also love the fact that Lotus bakeries have made a spread out of the squashed biscuits – it’s really delicious on toast and vegan-friendly too.

20200820_111314

But having a slightly twisted mind, I decided it would be great fun to turn a spread made out of biscuits, back into a biscuit.

I have had a few trial runs and made the following observations:


  1. Use a mixer. I usually cannot be bothered to get my free standing mixer out of the cupboard, as it weighs an absolute ton, but for these biscuits, it is vital that the butter and sugar creaming stage is intensive, so the mixture turns pale. Doing this by hand would be quite the palaver.
  2. Do use light brown sugar. It helps the biscuits keep their shape. You can substitute for other sugars, but be aware that the cookies may spread and not be as beautiful
  3. Don’t be tempted to put too much Biscoff spread into each cookie – they will split
  4. Use a plain cookie dough. I made a version with cocoa powder and it slightly overpowered the Biscoff taste
  5. Do use white chocolate. Milk and dark chocolate will also eclipse the Biscoff taste.
  6. You must freeze the Biscoff spread first and get it out at the very last minute to put into the cookies
  7. Don’t bake the cookies for too long. They should look slightly underdone when you remove them from the oven, as they continue to cook once on the cooling tray

Meta Cookies

Half a jar of Lotus Biscoff spread

175g light brown sugar

120g butter. I use unsalted, but salted would be fine too

1 egg

1 tsp vanilla extract

200g white chocolate, chopped into small chunks

275g plain flour

1/2 tsp bicarbonate of soda

1 tbsp cornflour

Line a baking tray with greaseproof baking parchment. Using a teaspoon, drop 15 blobs of Lotus Biscoff spread across the paper. Cover with another piece of parchment and place in the freezer for 30 minutes to 1 hour.

Preheat the oven to 170C

Using a free standing mixer or a hand mixer, cream the butter and sugar together until the mixture is several shades paler than when you started and the texture is light and fluffy.

Beat the egg and vanilla extract together in a small bowl. Add to the butter and sugar and mix in.

Add the flour, cornflour and bicarbonate of soda to the mix. Stir it in slowly at first, so your kitchen doesn’t get sprayed with white powder. Increase the mixer speed until all the flour is mixed in and you have a smooth dough.

Stir the chocolate chunks in by hand and place the dough in the fridge to chill for 5 minutes.

Remove the dough and Biscoff  spread blobs from their respective cold areas. Line two/three large baking trays with parchment. You can use the parchment that went in the freezer, if you are feeling thrifty.

Take a tablespoon of cookie dough and wrap it around a frozen blob of Biscoff spread. Place it on the baking tray – it should look a little like a golf ball. Try to keep a distance of about 2 centimetres between cookies. You may need a third tray for the last couple.

20200820_122006

Put the cookies in the oven and bake for 10 -12 minutes. They should be pale but firm. If you prefer very crunchy cookies, you may leave them for 13-14 minutes.

Put on a cooling tray and allow to cool a little before devouring. Warning, the Biscoff centre will be lava hot!


Surplus Courgettes? Try This Easy, Cheesy, Side Dish

20200815_130013

Late summer is the time when vegetable gardens burst with produce – and courgettes (zucchini) regularly yield generous harvests. I adore courgettes and have already posted a number of recipes on this blog – but I try to add a new courgette recipe each year, at a time when some readers may be dealing with a glut.

Last week I visited a very good restaurant and was served a delicious side dish of locally-grown courgettes baked with cheese. It was quite wonderful, and I asked the waitress for the recipe. I was told that the courgettes are first boiled, then put in a dish with some cheddar. Not the most detailed instructions, but definitely a start.

I turned to my beloved culinary tome “Mastering The Art Of French Cooking” and sifted through the many, many ideas for dealing with courgettes. I adapted one recipe to create a version of the restaurant dish.

This is easy to make, yet tastes sophisticated. An English take on a French classic, which makes a wonderful side for roast meats, fish, or as part of a vegetarian feast.

Easy Cheesy Courgettes

2 medium sized courgettes, washed and dried.

25g of grated parmesan

35g grated strong Cheddar. You can substitute Gruyere, if you want to be a bit more Frenchified

A little olive oil

Preheat the oven to 180C

Top and tail the courgettes and cut into batons around two inches long and half an inch wide. Leave the skin on, as it adds both to the flavour and texture.

Bring a large pan of salted water to the boil. Add the courgette batons and cook for around 5 to 7 minutes until they are starting to become tender but are still slightly undercooked. Drain well.

Butter a small baking dish. Mix the grated cheeses together and sprinkle a little on the bottom of the dish. Cover with a layer of cooked courgettes, season with salt and pepper, cover with a little more of cheese and repeat, finishing with a layer of cheese.  You don’t want to cover the courgettes in cheese. I know my photos may look like I have been a little mean, but trust me – this is the correct balance. Courgettes have such a delicate flavour, you want the cheese to enhance it, rather than drown.

Drizzle the top with a few drops of olive oil.

20200815_124501

Place in the oven for 15 minutes, then, if you like, you can brown under a medium grill, for a sizzling, crunchy top.